My Ender 3 Pro
IMG_1539

Ender 3 Pro in it current state
| Manufacturer: | Creality |
| Model: | Ender 3 Pro |
| Purchase: | May 2022 |
I've finished yet another round of upgrades on my Ender 3 Pro. This unit was a father's day present in 2022. The sprite hot end that I had installed at the beginning beginning of the year died. The placement of the wires allowed key parts of the silly thing to rub against prints. First I lost the thermistor. Finally I lost the stepper motor wires. And as far as I can tell, the only way to replace that cable is to fully dismantle the unit.
I managed to get the unit working again with an old hot end and extruder, but the setup was as janky as the day I decided to replace it. I was also experiencing random bouts of the printer just stopping mid-print.
I hemmed and hawed about buying a new printer, but the ones I really want are two expensive. And the ones I can justify buying are basically just an Ender 3 with new toys bolted on. The mechanics on this printer as still sound, so instead of buying a $200 bargain printer, I bought another $200 of upgrades to make my already bargain printer work better.
After stripping out the hotend, extruder, and main board, I was left with the stock frame, power supply, hot plate, and motion system. This unit has also been upgraded with dual z system that uses an extra stepper motor and thread (I purchased my off the shelf at Microcenter back in 2022):
This implementation also employs the CR touch from Creality for auto bed leveling:
I also use the BIGTREETECH Direct SFS Smart Filament Sensor. The nice this is that this sensor detects jams in addition to catching when filament runs out. Though to make it work properly, I use a reverse-boden tube to maintain tension between the sensor and the extruder.
For this implementation of my Printer of Theseus I have chosen the BIGTREETECH SKR MINI E3 V3.0 32 Bit Control (for Ender 3) driving the Microswiss NG Revo (for Ender 3).
One nice thing about having an old (but not quite archaic) and popular (but because it was cheap) printer is that there are a ton of high-quality, off-the-shelf mods for it. The downside is, of course, that to get your $200 printer doing anything useful, you are going to have to add another $300 of modifications.
By comparison, my Ender 5 S1 makes prints every bit as nice, and I haven't really added anything to it. Well, besides a steel nozzle. But that was because I used it enough that I wore out the brass nozzle.
Obstacles
Getting this setup running was not all smooth sailing, but a day in I'm pretty happy. The hardest parts have been:
- Compiling a custom firmware for Klipper. The Mainsail on the Sonic Pad knows nothing about the chipset on the SKS E3. I've posted a copy if mine here: firmware.bin
- Producing a working printer.cfg file. To save anyone else some time here is mine (for USB 2): printer.cfg
- You really, really need either direct shot or a reverse boden tube between your smart sensor and the extruder. Movement around the plate causes slack which can sometimes lead the extruder to think that filament hasn't advanced.
While I was putting the printer back together, I ended up designing a fabricating a custom bracket/cable guide. This bolts the Smart Sensor from Bigtree Tech onto the mounting point on the X gantry where the original boden extruder used to live. This design will be useful for anyone with an Ender 3, Ender 3 Pro, or Ender 3 V2. The version in the picture is a prototype. I removed the face in the foreground to eliminate mechanical interference with the top of the gantry.
IMG_1540
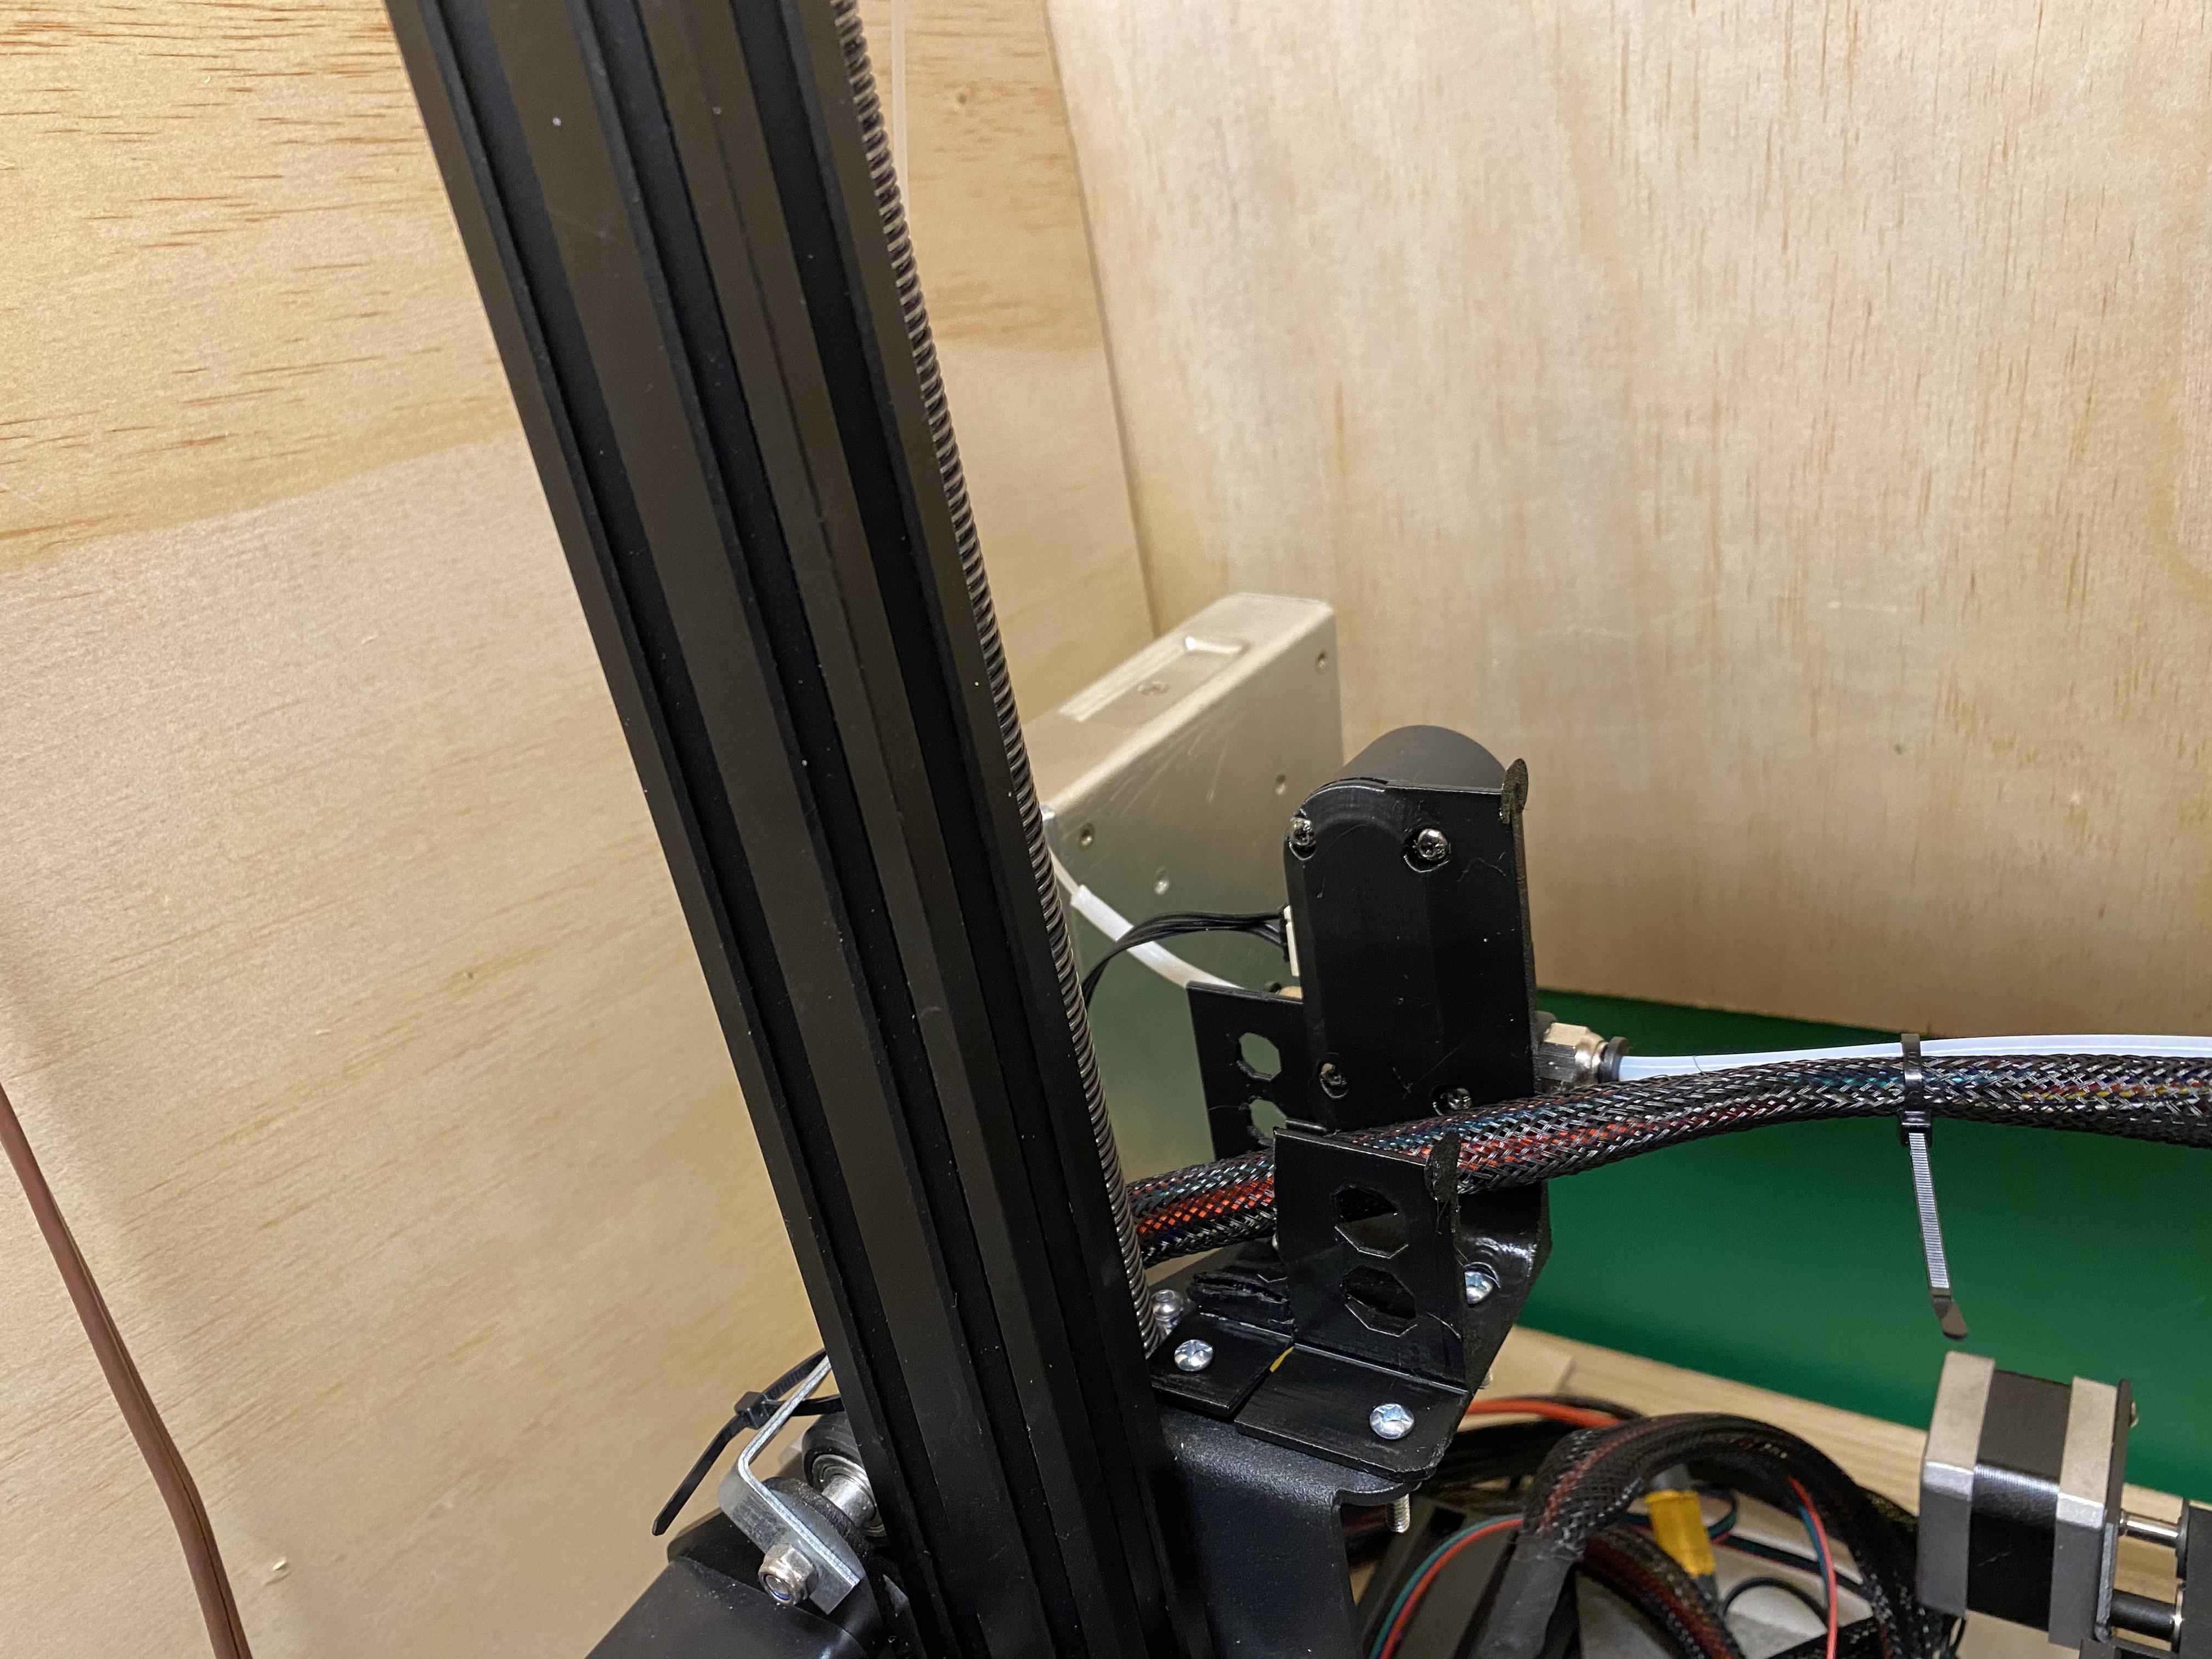
Custom Filament Sensor Mount / Cable Guide
The Enclosure
The enclosure in the picture is scratch-built contraption. I used 1x0.5inch ferring strips for the basic structure. The walls are 5mm plywood, sold as "underlayment" for flooring. The box is open on the floor, and has a solid ceiling. It is primary to cut down on noise in my office, and has a side benefit of controlling the temperature and humidity for long prints. It maintains about 15-20 degrees Fahrenheit (7-10 degrees Celsius) hotter than room temperature, which drops the humidity by 20-30 percent.
The front face is a solid sheet of plexiglass that is held on with magnets, with a lip on the front to hold most of the weight.